Stamps: Michael Strong (Mini Shapes)
Showing posts with label Mini Shapes. Show all posts
Thursday, February 11, 2016
Michael Strong Card of the Day - Technique Thursday
This uses the "Bingo Blast" technique shown in the April/May 2009 issue of Technique Junkies. The colours used are Fired Brick, Seedless Preserves and Peeled Paint.
Wednesday, February 10, 2016
Michael Strong Card of the Day - Wednesday
This uses the "Bingo Blast" technique shown in the April/May 2009 issue of Technique Junkies. The colours used are Peacock Feathers, Broken China and Tumbled Glass.
Stamps: Michael Strong (Mini Shapes)
Tuesday, February 9, 2016
Michael Strong Card of the Day - Tuesday
This uses the "Bingo Blast" technique shown in the April/May 2009 issue of Technique Junkies. The colours used are Squeezed Lemonade, Broken China and Picked Raspberry.
Stamps: Michael Strong (Mini Shapes)
Monday, February 8, 2016
Michael Strong Card of the Day - Monday
This uses the "Bingo Blast" technique shown in the April/May 2009 issue of Technique Junkies.
The colours used are Broken China, Tumbled Glass and Chipped Sapphire. The die cut is punched out of vellum. There is some translucent embossing done with a dots stencil.
Stamps: Michael Strong (Mini Shapes)
Friday, July 31, 2015
Wedding card
This is a wedding card I made for my second cousin who is getting married this summer. The pink is "Pink Pirouette". I used some shimmer spray on the heart.
Stamps: Michael Strong (Mini Shapes)
Tuesday, May 26, 2015
May Sketch
Here is my sketch for the Michael Strong Yahoo Groups May sketch challenge. The flower background is coloured with Brusho.
Stamps: Michael Strong (Mini Shapes)
Saturday, March 21, 2015
Michael Strong Spring Blog Hop
Time for another blog hop -- this one is to celebrate spring!
To make the background for this card I first embossed Mike's small flower in clear on white paper. Then I tore a sheet of paper and alternatively sponged on Tim Holtz Faded Jeans and the new Cracked Pistachio. Then I stamped the flower in both Pistachio and Jeans over top and spritzed a bit of water on top.
Stamps: Michael Strong (Mini Shapes, Mini Wings)
Next on the blog hop is LAURA:
http://holmadelaura.blogspot.com/
To make the background for this card I first embossed Mike's small flower in clear on white paper. Then I tore a sheet of paper and alternatively sponged on Tim Holtz Faded Jeans and the new Cracked Pistachio. Then I stamped the flower in both Pistachio and Jeans over top and spritzed a bit of water on top.
Stamps: Michael Strong (Mini Shapes, Mini Wings)
Next on the blog hop is LAURA:
http://holmadelaura.blogspot.com/
Friday, March 20, 2015
Winter Challenge Card
The Winter Challenge for the Michael Strong yahoo group was to make a card that was all white.
I applied some clear embossing paste to some white paper with a heart stencil. Then I painted some burlap white and put Mike's small hearts embossed in white on top. I added some pearls and a die cut and then to finish the card off I lightly sprayed with some glimmer mist.
Stamps: Michael Strong (Mini Shapes)
I applied some clear embossing paste to some white paper with a heart stencil. Then I painted some burlap white and put Mike's small hearts embossed in white on top. I added some pearls and a die cut and then to finish the card off I lightly sprayed with some glimmer mist.
Stamps: Michael Strong (Mini Shapes)
Monday, January 12, 2015
Brushod Hearts
This was based on last weeks Mojo Monday sketch but I never got around to putting it up. Mike's large heart was embossed in clear and then Brilliant Red Brusho was applied and let dry. I ironed off the embossing to flatten the card and then added some Tim Holtz frosted film and cut out. The tiny hearts were embossed in white. The paper is Real Red. I'm getting an early start on my Valentine's Day cards!
Stamps: Michael Strong (Cloisonné Heart, Mini Shapes)
Thursday, November 13, 2014
Shimmer Shadowed Heart
The pink I used for the card was Pink Pirouette. The square panel at the front uses the Shimmer Shadows technique from the Feb/Mar 2014 issue of Technique Junkies. I also used my colour spritzer to spray some pink onto the panel before I placed the hearts on and I used some shimmer spray to spray originally. The rectangular panel behind it was just stamped all over in pink with the small heart and then sponged with pink. The main panel at the very back was just sponged in pink. The layout is this week's Mojo Monday sketch (#371).
Stamps: Michael Strong (Mini Shapes), Create with TLC (Free saying)
Tuesday, June 3, 2014
Michael Strong Card of the Day - Tuesday
For this card I used a diamond stencil and applied some embossing paste to watercolour paper to make the raised diamonds. When that was dry I painted some twinkling H20's (Mallard, Rainforest) on top. I distressed the edges and mounted on black then Garden Green paper. The leaf die cut is in Garden Green. Mike's small flower stamped in black on Tangerine Tango paper was cut out with his die cut and added on top of some black canvas ribbon. A few black enamel dots were also added.
Wednesday, March 5, 2014
Michael Strong Card of the Day - Wednesday
Here's the card for today! It uses Mike's small flower stamped in gold on white and matted with gold and Chocolate Chip paper. Also some Chocolate Chip ribbon.
The background is something called "Faux Patina". Here's how I achieved the look:
Step 1:
First you ink an embossing folder with a light coloured ink (Crumb Cake) and put your cardstock through.
Step 2:
Then you sponge on a slightly darker colour (Lucky Limeade)
Step 3:
and then sponge on an even darker colour (Garden Green)
Step 4:
and finally you sponge on a very dark colour (Chocolate Chip).
Step 5:
The next step according to the tutorial on Splitcoaststampers is to dry the paper, lightly rub Versamark on the top and then emboss with gold embossing powder. I didn't want to get my new Versamark pad dirty so I just rubbed on some gold ink on the top.
Ooops!:
Then I poured on some gold embossing powder and got this. Yeah, I forgot to dry off the paper. Okay, I didn't forget I just didn't do a very good job because I was a little impatient. Anyhow, I'll use that for something else. I made another sheet with the same colours and used that for my card. But this time I dusted off the embossing powder (with a paintbrush) when it stuck to places I didn't want it to get stuck to! Yeah, still was impatient with the drying...
The background is something called "Faux Patina". Here's how I achieved the look:
Step 1:
First you ink an embossing folder with a light coloured ink (Crumb Cake) and put your cardstock through.
Step 2:
Then you sponge on a slightly darker colour (Lucky Limeade)
Step 3:
and then sponge on an even darker colour (Garden Green)
Step 4:
and finally you sponge on a very dark colour (Chocolate Chip).
Step 5:
The next step according to the tutorial on Splitcoaststampers is to dry the paper, lightly rub Versamark on the top and then emboss with gold embossing powder. I didn't want to get my new Versamark pad dirty so I just rubbed on some gold ink on the top.
Ooops!:
Then I poured on some gold embossing powder and got this. Yeah, I forgot to dry off the paper. Okay, I didn't forget I just didn't do a very good job because I was a little impatient. Anyhow, I'll use that for something else. I made another sheet with the same colours and used that for my card. But this time I dusted off the embossing powder (with a paintbrush) when it stuck to places I didn't want it to get stuck to! Yeah, still was impatient with the drying...
Thursday, February 13, 2014
Valentine's Day
I made a couple of tags to put on my Valentine's Day presents to the kids.
Put some Barn Door distress stains on a couple of tags.
Brayered on a bit of Fired Brick distress stain.
Brayered on a bit of Picket Fence distress stain.
Stamped a script stamp on them.
Splattered some twinkling H2Os on.
Stamped Mike's small heart in Barn Door and cut out.
Here are the presents. Both the kids love soccer...
Put some Barn Door distress stains on a couple of tags.
Brayered on a bit of Fired Brick distress stain.
Brayered on a bit of Picket Fence distress stain.
Stamped a script stamp on them.
Splattered some twinkling H2Os on.
Stamped Mike's small heart in Barn Door and cut out.
Here are the presents. Both the kids love soccer...
Sunday, February 9, 2014
Wedding Card
Here is a card I made for a couple who recently were married. They are Indian so someone told us that red was a traditional colour for weddings and also told us what to say for the sentiment. Apparently it means "Enjoy a happy life!" I used Michael Stong's small heart.
Thursday, January 23, 2014
Michael Strong Card of the Day - Technique Thursday
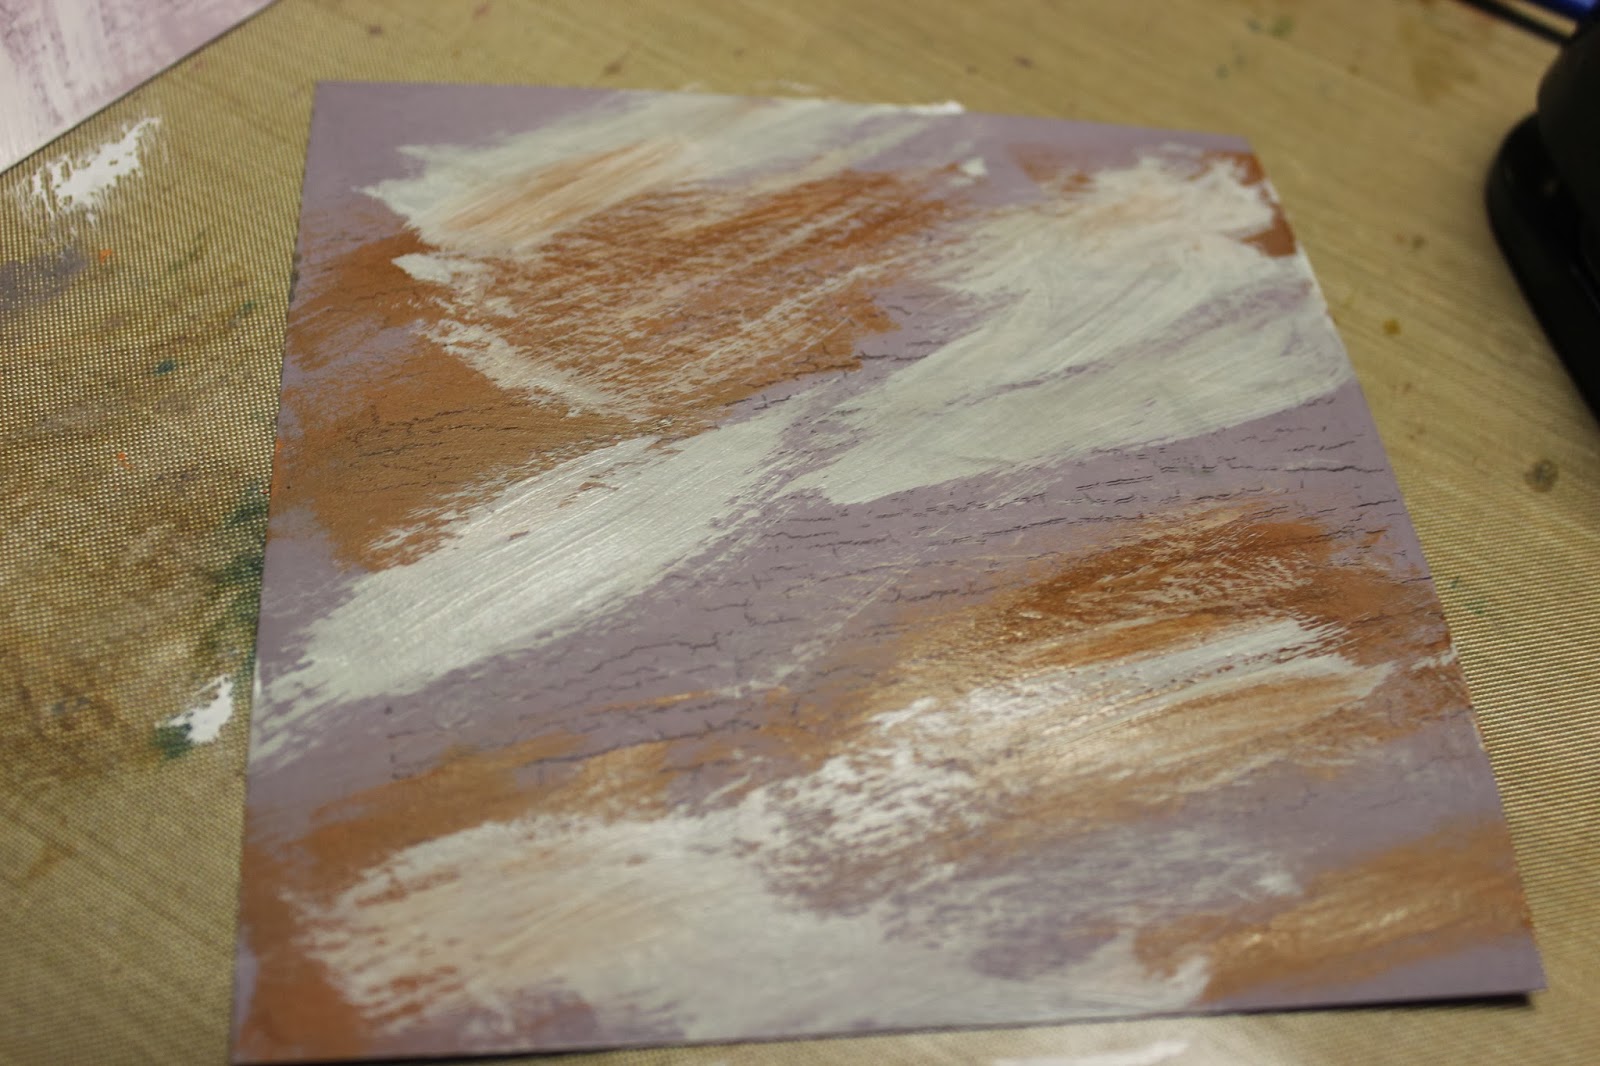
A few weeks ago on Splitcoaststampers they had a tutorial for "Layered Gesso Background" which I wanted to try. So here's my attempt. Actually two attempts. My first one was quite a bit different from the tutorial and I didn't really like the result so I made another following the tutorial more closely. But then I ended up finishing both cards and quite like my original result. Anyhow, here goes the first:
TRY #1
Step1:
Here you are supposed to cover a piece of mixed media paper with gesso. I didn't want to go with just white gesso so I dyed my gesso brown with some chocolate chip re-inker. My plan was to use my little Gecko in here at the end so I thought brown would work better for him.
Step 2:
Stamp the paper with archival ink. I used brown Stazon.
Step 3:
Paint the paper with a light acrylic paint.
Here I was going from memory and forgot the paint was supposed to be light...I used bright orange paint. It dulled a bit when dried...
Step 4:
Paint over random portions with gesso.
Step 5:
Apply a metallic finish.
The closest metallic finish I had was a copper ink which I smudge over top. Whatever. You can tell it's shimmery.
Step 6:
Use a stencil with some modelling paste.
I actually did have some embossing paste (is that what they meant by modelling paste???) but it was white so I dyed it brown. Then used a stencil to cover most of the paper. I think I got a bit carried away with the paste....
Step 7:
Finish the card. I originally had everything planned to go with my Gecko. But didn't really like the look of him on this card. So I gave up and tried again -- this time following the rules a bit more.
TRY #2
Step 1:
Just white gesso.
Step 2:
Black Stazon and I stamped a few little Seahorses because that's what they did in the tutorial.
Step 3:
Okay, I didn't really have light acrylic paint so I used blue. I guess I could have added white to lighten it up a bit. Didn't want to bother. I'm a bit of a rebel.
Step 4:
Added some white gesso...
Step 5:
This is silver paint. That's the closest metallic thing I had that matched...
Step 6:
Ooops! Forgot to take a photo of the finish!!! Oh well, you can see it in the result. The embossing paste I kept white and the stencil was just some random dots.
Step 7:
Finished! I added some white yarn and my favourite sentiment. I also tried to add the larger seahorse on top but didn't like it.
Back to my first try. I did like the result but just couldn't figure out how to add my gecko in there. So I went crazy and added Mike's Mini Flower instead!
I find when cutting out the flower I spend so much time figuring out exactly how to position the flower to get it to cut out right. Then I had this idea -- put the word "dots" to like up the petal with the dots on it. Now I have it lined up perfectly right away. Here's what I mean:
So take your paper and like up the flower petal with the dots with the cut out petal that says "dots" on it. Much less time to cut the flowers out now. I also did this with my bigger flower.
Anyhow here's the result of my first try:
The flowers are cut out of "Dusty Durango" paper and stamped and sponged with Chocolate Chip. The middle of the flower is copper ink sponged on Dusty Durango, punched out with a small circle punch and then sponge around the edge with Chocolate Chip.
Hope you enjoyed both cards. The second one is not really my style but I do like it quite a bit.
TRY #1
Step1:
Here you are supposed to cover a piece of mixed media paper with gesso. I didn't want to go with just white gesso so I dyed my gesso brown with some chocolate chip re-inker. My plan was to use my little Gecko in here at the end so I thought brown would work better for him.
Step 2:
Stamp the paper with archival ink. I used brown Stazon.
Step 3:
Paint the paper with a light acrylic paint.
Here I was going from memory and forgot the paint was supposed to be light...I used bright orange paint. It dulled a bit when dried...
Step 4:
Paint over random portions with gesso.
Step 5:
Apply a metallic finish.
The closest metallic finish I had was a copper ink which I smudge over top. Whatever. You can tell it's shimmery.
Step 6:
Use a stencil with some modelling paste.
I actually did have some embossing paste (is that what they meant by modelling paste???) but it was white so I dyed it brown. Then used a stencil to cover most of the paper. I think I got a bit carried away with the paste....
Step 7:
Finish the card. I originally had everything planned to go with my Gecko. But didn't really like the look of him on this card. So I gave up and tried again -- this time following the rules a bit more.
TRY #2
Step 1:
Just white gesso.
Step 2:
Black Stazon and I stamped a few little Seahorses because that's what they did in the tutorial.
Step 3:
Okay, I didn't really have light acrylic paint so I used blue. I guess I could have added white to lighten it up a bit. Didn't want to bother. I'm a bit of a rebel.
Step 4:
Added some white gesso...
Step 5:
This is silver paint. That's the closest metallic thing I had that matched...
Step 6:
Ooops! Forgot to take a photo of the finish!!! Oh well, you can see it in the result. The embossing paste I kept white and the stencil was just some random dots.
Step 7:
Finished! I added some white yarn and my favourite sentiment. I also tried to add the larger seahorse on top but didn't like it.
Back to my first try. I did like the result but just couldn't figure out how to add my gecko in there. So I went crazy and added Mike's Mini Flower instead!
I find when cutting out the flower I spend so much time figuring out exactly how to position the flower to get it to cut out right. Then I had this idea -- put the word "dots" to like up the petal with the dots on it. Now I have it lined up perfectly right away. Here's what I mean:
So take your paper and like up the flower petal with the dots with the cut out petal that says "dots" on it. Much less time to cut the flowers out now. I also did this with my bigger flower.
Anyhow here's the result of my first try:
The flowers are cut out of "Dusty Durango" paper and stamped and sponged with Chocolate Chip. The middle of the flower is copper ink sponged on Dusty Durango, punched out with a small circle punch and then sponge around the edge with Chocolate Chip.
Hope you enjoyed both cards. The second one is not really my style but I do like it quite a bit.
Tuesday, November 19, 2013
Michael Strong Card of the Day - Tuesday
The card today uses Mikes small flower stamp along with a smaller circle, set of 3 circles and outline stamp from Stampin Up! The ink is from Stampin Up! (Melon Mambo, Tangerine Tango, Summer Sun, Wild Wasabi, Pacific Point) as is the ribbon. The black splotches are enamel accents. The sentiment is also Stampin Up! This was a quick and easy card to make and I really like the bright colours.
To create the card I stamped Mikes flower in yellow across the middle of the paper. Then I stamped the solid circle, circle outline and 3 dots in yellow around and overtop the flowers. I then did the same thing in red at the top and blue at the bottom. I did the colours out of order because I found it was then easier to divide my paper in fifths. I filled in the middle parts with orange and green, overlapping with the existing colours slightly. The sentiment I had to put in the middle on the yellow so it'd be easier to read.
Monday, November 18, 2013
Michael Strong Card of the Day - Monday
I'm card captain again this week. Lately I've seen quite a few cards that are "rainbowy" in nature so I've made a few of those with Mike's stamps. Here's the first. It uses Stampin Up! paper and buttons ("Real Red", "Tangerine Tango", "Daffodil Delight", "Wild Wasabi", "Marina Mist" and "Elegant Eggplant") with a saying I love from the set "Friendly Advice" by Inkadinkado. Mike's small heart was embossed in white and punched out using his die cuts. I tied a silver bow to the blue button just to make it a little different.
Wednesday, September 18, 2013
Michael Strong Card of the Day - Wednesday
Here is a cool red background (Dylusions sprays and a stencil) that I split up and made into 4 cards:
and my favourite one:
Monday, April 8, 2013
Michael Strong Card of the Day - Monday
This week is my week to be card captain for the Michael Strong Yahoo Group. Here's my card for Monday. I've really liked the look of faux postage for quite awhile so I bought the Sizzix postage die "Frames, Stamp Combo" and used that to make the postage stamp. I used Michael's Cloisonne Flower to make the picture on the "stamp". The lines and numbers were from a clear stamp set I have but I don't remember the name of it. I also used an old Mojo Monday sketch and copied the layout from that.
The colours I used were Vanilla, Pumpkin Pie and More Mustard cardstock (the brads are More Mustard) from Stampin Up! and Dried Marigold and Spiced Marmelade Tim Holtz inks. I also used the Large Delicate Doilies die from Stampin Up!
Thursday, February 17, 2011
Michael Strong February Challenge card
Here's my card for the Michael Strong Yahoo group February challenge. We are supposed to make a Valentine's Day/Love card with no red or pink. I used Marina Mist and Vanilla.
I really liked the simplistic look of the card so I made up an 8x8 scrapbook page very similar to it:
Subscribe to:
Posts (Atom)