
Friday, August 22, 2014
Sketchy Lily
Made this for a sketch challenge over at the My Favorite Things blog. I sponged the lily background and the Thanks die cut with Spun Sugar. The lily was cut out using the matching die cutter.
Stamp set: Michael Strong (The Lily Set)
Thursday, August 21, 2014
Red, Navy and Gold
This was made for a colour challenge (Red, Navy and Gold) on the Reverse Confetti blog:
 Stamp set: Reverse Confetti (Spooky Cuties)
Tuesday, August 19, 2014
Burnished Neon
This is a modified "Burnished Watercolours" technique from the Aug/Sept 2007 issue of Technique Junkies. I had a neon pink "Thank You" die cut I made but ended up not using on another card so I decided to make this quick card. I didn't have a daubber that was small enough so I ended up using a Q-tip! I wanted the "Thank You" to stand out so I used some vellum to soften the background.
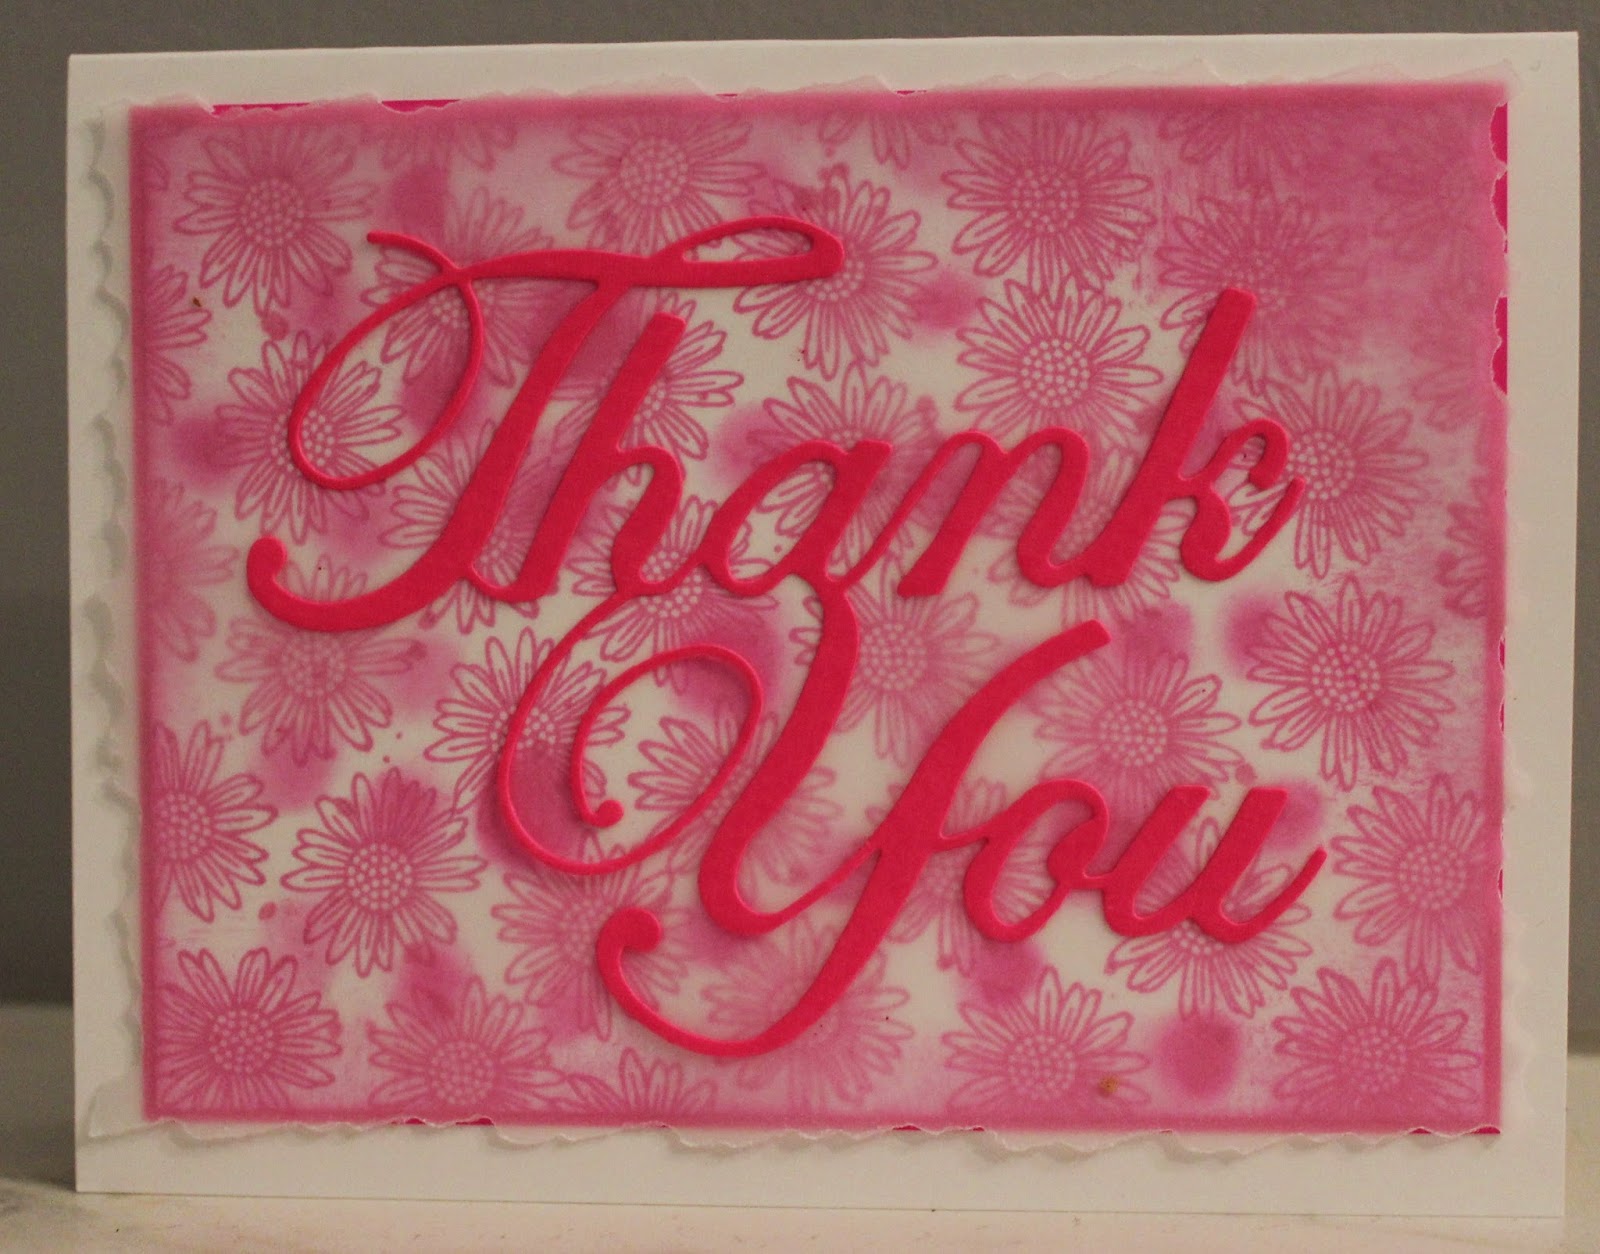 Stamp: Michael Strong (Hannah's Busy Bee)
Monday, August 18, 2014
Distressed Sunday
The background was made by using the Distressed Fingerpainting technique from the Aug/Sept 2014 issue of Technique Junkies using Chipped Sapphire and Picket Fence distress paint. I then stamped on the background stamp (Leaf and Floral Background) with Chipped Sapphire distress ink. Since this was based on this weeks Sunday sketch I had to put something over it but I really liked it and didn't want to cover it up so I used vellum. The flower is a Susan's Garden flower (mini daisy).
 Stamps: Hero Arts (Leaf and Floral Background), Stampin Up! (Voila!)
Colours: Chipped Sapphire, Elegant Eggplant
Colours: Chipped Sapphire, Elegant Eggplant
Friday, August 15, 2014
Distressed Shooting Star
The blue background was made by using the Distressed Fingerpainting technique from the Aug/Sept 2014 issue of Technique Junkies using Chipped Sapphire and Broken China paint. When it was dry I embossed it with an old embossing folder and ran a white craft pad over the top to accentuate the embossing. The layout is based on this weeks sketch over at My Favorite Things.

Thursday, August 14, 2014
Orange and Yellow in Distress!
It's a pretty simple card so you can focus on the background. It was made by using the Distressed Fingerpainting technique from the Aug/Sept 2014 issue of Technique Junkies. The colours used were Mustard Seed and Ripe Persimmon. I also stamped a Hero Arts background stamp in Mustard Seed distress ink on top after it dried.
 Stamp: Hero Arts (Leaf And Floral Background)
Wednesday, August 13, 2014
Distressed Gecko
Another example of Distressed Fingerpainting from the Aug/Sept 2014 issue of Technique Junkies. This time I used Mowed Lawn and Mustard Seed for the paints.
 Stamps: Michael Strong (Mini Creatures)
Tuesday, August 12, 2014
Distressed Fingerpainting
The blue background is a technique called "Distressed Fingerpainting" from the Aug/Sept 2014 issue of Technique Junkies. For that I used Broken China, Salty Ocean and Picket Fence. The layout is this weeks Mojo Monday sketch.
 Stamps: Stampin Up! (Secret Garden, That's the Ticket, Sanded)
Paper: Pacific Point, Whisper White, Basic Black
Paper: Pacific Point, Whisper White, Basic Black
Monday, August 11, 2014
Burnished Screen card
My favourite technique of all time is the "Burnished Watercolours" technique from the Aug/Sept 2007 issue of Technique Junkies. Here it is on a screen card which I just learned how to make:
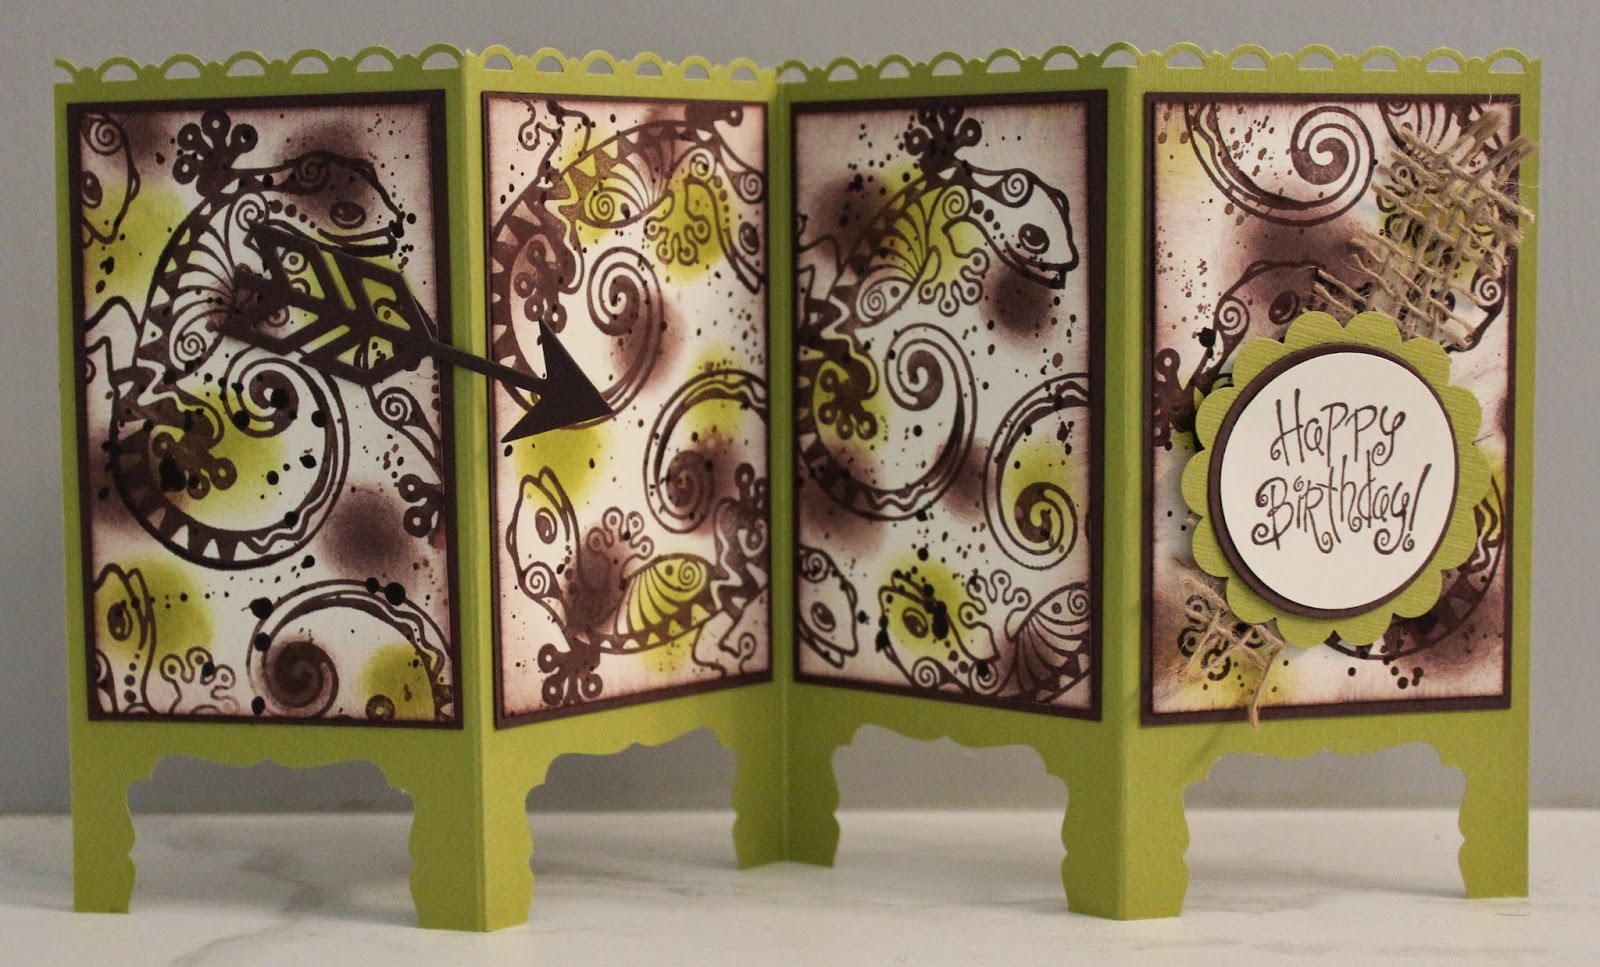 Stamps: Michael Strong (Cloisonné Gecko), Stampin Up! (Voila)
Colours: Kiwi Kiss, Chocolate Chip
Colours: Kiwi Kiss, Chocolate Chip
Friday, August 8, 2014
Stencil Spray with a Twist Screen Card
In my Michael Strong yahoo group we were shown a Screen card for Technique Thursday. I liked the look so decided to make one. Very quick and easy!
1. Cut some paper 12"x6"
2. Score the long side at 6"
3. Flip the paper over and score the long side at 3" and 9:
4. Take a border punch and punch all the way across the top. (I used Stampin Up! Scallop Trim Border punch)
5. Now take another punch and punch each panel on the bottom to make the legs. (I used Stampin Up! Decorative Label punch)
6. You are done! Fold and decorate!
I originally thought I should punch the border before I scored so it'd be easier to punch. But then my border would rip when I scored. So I scored first then punched and finally folded and I think that worked best. If I folded first it was harder to punch. I also thought of drawing a light pencil line so that the bottom punches all lined up but A) I'm a little too lazy to erase and B) it just seemed like a hassle what with having to find a pencil and everything. I ended up drawing a couple of lines on my punch (with marker) so I knew where the bottom should line up each time. That worked for me.
The panels are all 2.75"x4.25". I used the "Stencil Spray with a Twist" technique from the April/May 2014 issue of Technique Junkies. After the silver smootch I used for that dried I also applied some macro beads onto the paper with some glue applied over a circle stencil so the beads only stuck in circles. The butterfly die cuts are from a Stampin Up! die.
 Stamps: Stampin Up! (Sanded, Sassy Salutations)
Ink: Salty Ocean
Paper: Bashful Blue, Whisper White
1. Cut some paper 12"x6"
2. Score the long side at 6"
3. Flip the paper over and score the long side at 3" and 9:
4. Take a border punch and punch all the way across the top. (I used Stampin Up! Scallop Trim Border punch)
5. Now take another punch and punch each panel on the bottom to make the legs. (I used Stampin Up! Decorative Label punch)
6. You are done! Fold and decorate!
I originally thought I should punch the border before I scored so it'd be easier to punch. But then my border would rip when I scored. So I scored first then punched and finally folded and I think that worked best. If I folded first it was harder to punch. I also thought of drawing a light pencil line so that the bottom punches all lined up but A) I'm a little too lazy to erase and B) it just seemed like a hassle what with having to find a pencil and everything. I ended up drawing a couple of lines on my punch (with marker) so I knew where the bottom should line up each time. That worked for me.
The panels are all 2.75"x4.25". I used the "Stencil Spray with a Twist" technique from the April/May 2014 issue of Technique Junkies. After the silver smootch I used for that dried I also applied some macro beads onto the paper with some glue applied over a circle stencil so the beads only stuck in circles. The butterfly die cuts are from a Stampin Up! die.
Ink: Salty Ocean
Paper: Bashful Blue, Whisper White
Thursday, August 7, 2014
Neutral Resist Strips
Here I used the Resist Strips technique (Aug/Sept 2014 issue of Technique Junkies) with alternating shades of Antique Linen and Tea Dye. I used Vanilla cardstock, some burlap and a few enamel dots.
 Stamps: JudiKins (Origami), Stampin Up! (Voila)
Wednesday, August 6, 2014
Early Halloween
Just getting started on my Halloween cards! I recently picked up this set so I thought I'd give it a try.

Tuesday, August 5, 2014
Resist Strips
This is the "Resist Strips" technique from the Aug/Sept 2014 issue of Technique Junkies.
Top stripe: Squeezed Lemonade
Middle stripe: Ripe Persimmon
Bottom stripe: Barn Door
 Stamps: JudiKins (Origami)
Die cuts: Reverse Confetti (Doin' the Wave, Arrow)
Top stripe: Squeezed Lemonade
Middle stripe: Ripe Persimmon
Bottom stripe: Barn Door
Die cuts: Reverse Confetti (Doin' the Wave, Arrow)
Friday, August 1, 2014
Turquoise Embossed Puzzle Pieces
I first used Tempting Turquoise embossing powder on the puzzle piece. Let this harden then stamped a vein stamp on with Versamark and embossed with black embossing powder.
To make the card I stamped the sentiment on a 4.5"x4.5" piece of Whisper White paper and placed on a slightly larger silver paper then put on the base which is textured Basic Black cardstock - 5.5"x5.5". Behind the puzzle piece is some black burlap and silver ribbon.
 Stamps: Stampin Up! (Voila!), Stampendous (TC01 Marble Texture Cube)
To make the card I stamped the sentiment on a 4.5"x4.5" piece of Whisper White paper and placed on a slightly larger silver paper then put on the base which is textured Basic Black cardstock - 5.5"x5.5". Behind the puzzle piece is some black burlap and silver ribbon.
Subscribe to:
Posts (Atom)